Migrating OVH DNS records from Terraform to Pulumi
This post is part of my series on migrating my Homelab from Terraform to Pulumi. Here, I’ll walk through how I manage DNS records in Pulumi and how I imported them from Terraform so the migration can be fully automated.
Other parts in this series:
- Why I am migrating my Homelab IaC from Terraform to Pulumi
- Migrating OVH DNS records from Terraform to Pulumi (this one)
- Migrating Proxmox LXC containers from Terraform to Pulumi
- How to manage Pulumi Secrets with 1Password
- Rookie mistakes I made with Pulumi dependency tracking
- Pulumi vs Terraform: honest retrospective after a full migration
My Homelab DNS requirements
My Homelab setup uses several kinds of DNS records:
- Many CNAME records that map short, readable names to an Nginx reverse proxy. The proxy then forwards each incoming request to the correct private IP and port.
- A few A records that point directly to private IPs. These aren’t accessible outside my network, and that’s intentional as those services are meant to stay private.
- Some dynamic host records used to expose a few services publicly. These combine dynamic host login credentials (configured later in my public-facing services) and the DNS records that clients will query.
Setting this up with the Pulumi OVH provider is straightforward. I created a small wrapper class around the provider to reduce some boilerplate. The most interesting part is the helper function for creating a dynamic host record:
import * as ovh from "@ovhcloud/pulumi-ovh";
import type * as pulumi from "@pulumi/pulumi";

const rootDomainName = 'my-domain-name.ovh'

const createDynhostRecord({
    publicDomainName,
    loginSuffix,
    password,
}: {
    publicDomainName: string;
    loginSuffix: pulumi.Input<string>;
    password: pulumi.Input<string>;
}) => {
    const dynhostLogin = new ovh.domain.DynhostLogin(
        publicDomainName,
        {
            zoneName: rootDomainName,
            loginSuffix,
            password,
            subDomain: publicDomainName.slice(0, -rootDomainName.length - 1),
        },
    );

    new ovh.DomainZoneDynhostRecord(publicDomainName, {
        zoneName: dynhostLogin.zoneName,
        subDomain: dynhostLogin.subDomain,
        ip: "1.1.1.1",
    });
}Code language: TypeScript (typescript)
I pass the login suffix and password as inputs from the caller. Both values come from 1Password (I’ll explain how in a separate post).
This setup ensures all required DNS records exist. However, I still need to import the existing records; otherwise, Pulumi will fail during apply, since the resources already exist even though they’re not part of the Pulumi state yet.
Importing existing OVH DNS records in bulk
Importing them is a bit tricky. Pulumi allows importing resources one by one or in bulk via an import file. Instead of creating this file by hand, you can generate it automatically with:
pulumi preview --import-file ./import.jsonCode language: Bash (bash)The resulting import.json will look like this (with many more entries):
{
"resources": [
{
"type": "ovh:Domain/zoneRecord:ZoneRecord",
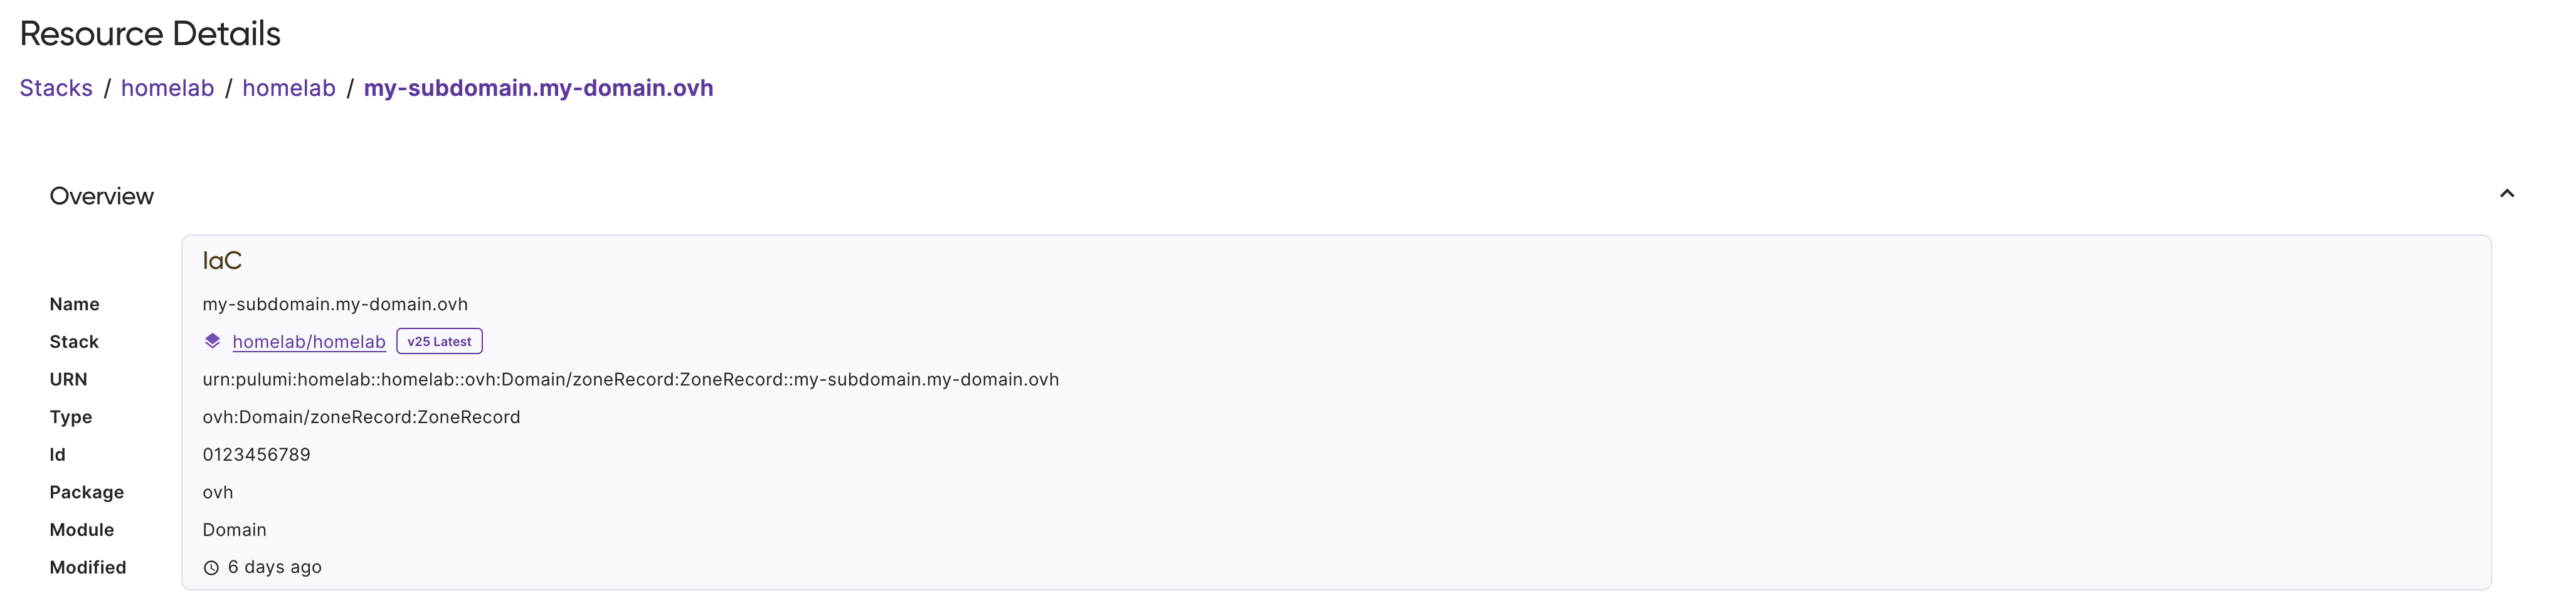
"name": "my-subdomain.my-domain.ovh",
"id": "<PLACEHOLDER>",
"version": "2.10.0",
"pluginDownloadUrl": "github://api.github.com/ovh/pulumi-ovh"
}
]
}Code language: JSON / JSON with Comments (json)Notice the <PLACEHOLDER> value for id. You must replace this with the actual ID used by the OVH provider.
Each provider computes resource IDs differently. You can discover the ID format by creating a dummy resource and inspecting the Pulumi state. For OVH DNS records, you’ll see that the ID is a simple numeric value.
This matches the ID used by the Terraform OVH provider. A Terraform state with OVH DNS records looks like:
{
  // Other fields omitted for brevity
  "resources": [{
    // Other fields omitted for brevity
    "type": "ovh_domain_zone_record",
    "provider": "provider[\"registry.terraform.io/ovh/ovh\"]",
    "instances": [{
      // Other fields omitted for brevity
      "attributes": {
        // Other fields omitted for brevity
        "id": "0123456789" // NUMERIC_ID
      }
    }]
  }]
}Code language: JSON / JSON with Comments (json)
However, Pulumi OVH provider uses a different format for imports. Instead of just NUMERIC_ID, the import ID must be:
<NUMERIC_ID>.<DNS_ZONE>Code language: HTML, XML (xml)So in this example, the ID you should use is:
0123456789.my-domain.ovhCode language: CSS (css)Can I get the ID without a Terraform state?
Yes. A slightly cumbersome but easy method is:
- Open the DNS record in the OVH web admin panel.
- Check the browser’s dev tools.
- You’ll see a network request to
https://manager.eu.ovhcloud.com/engine/apiv6/domain/zone/<DNS_ZONE>/record/<NUMERIC_ID>
You can also fetch these in bulk using the OVH API.
Once you’ve replaced all placeholders, import everything in one go:
pulumi import -f ./import.jsonCode language: Swift (swift)Importing existing OVH DNS records one by one
You can also import individual records. You’ll need three things:
- The resource type. For OVH DNS records it is
ovh:Domain/zoneRecord:ZoneRecord. (I pulled this from the generated JSON import file; I’m not sure of another direct way). - The resource name. The name you assigned to the Pulumi resource on creation.
- The import ID, in the import format. Note that for OVH DNS records this is
<NUMERIC_ID>.<DNS_ZONE>.
For the earlier example ( my-subdomain.my-domain.ovh, ID 0123456789), the import command is:
pulumi import ovh:Domain/zoneRecord:ZoneRecord my-subdomain.my-domain.ovh 0123456789.ulz.ovhCode language: Bash (bash)
No replies on “Migrating OVH DNS records from Terraform to Pulumi”